
Transformers documentation
画像キャプション生成
画像キャプション生成
画像キャプション生成は、与えられた画像に対するキャプションを予測するタスクです。一般的な実世界での応用例としては、視覚障害のある方がさまざまな状況での移動を支援するものが挙げられます。したがって、画像キャプション生成は、画像を説明することにより、人々のコンテンツへのアクセシビリティを向上させるのに役立ちます。
このガイドでは、次の方法について説明します:
- 画像キャプション生成モデルをファインチューニングします。
- ファインチューニング済みのモデルを推論に使用します。
開始前に、必要なライブラリがすべてインストールされていることを確認してください。
pip install transformers datasets evaluate -q
pip install jiwer -q
モデルをコミュニティにアップロードして共有できるよう、Hugging Face アカウントへのログインをお勧めします。プロンプトが表示されたら、ログイン用のトークンを入力してください:
from huggingface_hub import notebook_login

notebook_login()
Pokémon BLIPキャプションデータセットを読み込みます
🤗 Dataset ライブラリを使用して、{image-caption} のペアで構成されるデータセットを読み込みます。PyTorch で独自の画像キャプションデータセットを作成するには、このノートブックに従ってください。
from datasets import load_dataset

ds = load_dataset("lambdalabs/pokemon-blip-captions")
dsDatasetDict({
train: Dataset({
features: ['image', 'text'],
num_rows: 833
})
})データセットには、imageとtextという2つの機能があります。
多くの画像キャプションデータセットでは、1つの画像に対して複数のキャプションが含まれています。そのような場合、学習中に利用可能なキャプションからランダムに1つをサンプリングすることが一般的な戦略です。
train_test_split メソッドを使用して、データセットの train スプリットを train セットと test セットに分割します:
ds = ds["train"].train_test_split(test_size=0.1)
train_ds = ds["train"]
test_ds = ds["test"]
トレーニングセットからいくつかのサンプルを可視化してみましょう。
from textwrap import wrap
import matplotlib.pyplot as plt
import numpy as np


def plot_images(images, captions):
    plt.figure(figsize=(20, 20))
    for i in range(len(images)):
        ax = plt.subplot(1, len(images), i + 1)
        caption = captions[i]
        caption = "\n".join(wrap(caption, 12))
        plt.title(caption)
        plt.imshow(images[i])
        plt.axis("off")


sample_images_to_visualize = [np.array(train_ds[i]["image"]) for i in range(5)]
sample_captions = [train_ds[i]["text"] for i in range(5)]
plot_images(sample_images_to_visualize, sample_captions)
データセットの前処理
データセットには2つのモダリティ(画像とテキスト)があるため、前処理パイプラインでは画像とキャプションの前処理を行います。
そのためには、ファインチューニング対象のモデルに関連付けられたプロセッサクラスを読み込みます。
from transformers import AutoProcessor

checkpoint = "microsoft/git-base"
processor = AutoProcessor.from_pretrained(checkpoint)
プロセッサは、画像の事前処理(リサイズおよびピクセルのスケーリングを含む)とキャプションのトークン化を内部で実行します。
def transforms(example_batch):
    images = [x for x in example_batch["image"]]
    captions = [x for x in example_batch["text"]]
    inputs = processor(images=images, text=captions, padding="max_length")
    inputs.update({"labels": inputs["input_ids"]})
    return inputs


train_ds.set_transform(transforms)
test_ds.set_transform(transforms)
データセットの準備が整ったら、次にファインチューニング用のモデルを設定できます。
ベースモデルを読み込む
“microsoft/git-base” を AutoModelForCausalLM オブジェクトに読み込みます。
from transformers import AutoModelForCausalLM

model = AutoModelForCausalLM.from_pretrained(checkpoint)
評価
画像キャプション生成モデルは、通常、Rouge ScoreまたはWord Error Rateで評価されます。このガイドでは、Word Error Rate (WER)を使用します。
そのために、🤗 Evaluate ライブラリを使用します。WER の潜在的な制限やその他の注意点については、このガイドを参照してください。
from evaluate import load
import torch

wer = load("wer")


def compute_metrics(eval_pred):
    logits, labels = eval_pred
    predicted = logits.argmax(-1)
    decoded_labels = processor.batch_decode(labels, skip_special_tokens=True)
    decoded_predictions = processor.batch_decode(predicted, skip_special_tokens=True)
    wer_score = wer.compute(predictions=decoded_predictions, references=decoded_labels)
    return {"wer_score": wer_score}
学習
これで、モデルのファインチューニングを開始する準備が整いました。このために🤗 Trainerを使用します。
まず、TrainingArguments を使用して学習引数を定義します。
from transformers import TrainingArguments, Trainer

model_name = checkpoint.split("/")[1]

training_args = TrainingArguments(
    output_dir=f"{model_name}-pokemon",
    learning_rate=5e-5,
    num_train_epochs=50,
    fp16=True,
    per_device_train_batch_size=32,
    per_device_eval_batch_size=32,
    gradient_accumulation_steps=2,
    save_total_limit=3,
    eval_strategy="steps",
    eval_steps=50,
    save_strategy="steps",
    save_steps=50,
    logging_steps=50,
    remove_unused_columns=False,
    push_to_hub=True,
    label_names=["labels"],
    load_best_model_at_end=True,
)
次に、それらをデータセットとモデルとともに🤗 Trainerに渡します。
trainer = Trainer(
    model=model,
    args=training_args,
    train_dataset=train_ds,
    eval_dataset=test_ds,
    compute_metrics=compute_metrics,
)学習を開始するには、Trainerオブジェクトに対してtrain()を呼び出すだけです。
trainer.train()
トレーニングが進むにつれて、トレーニング損失が滑らかに低下していることを確認できます。
トレーニングが完了したら、push_to_hub() メソッドでモデルを Hub に共有し、誰でもそのモデルを利用できるようにしてください。
trainer.push_to_hub()
推論
test_dsからサンプル画像を取得して、モデルをテストします。
from PIL import Image
import requests

url = "https://huggingface.co/datasets/sayakpaul/sample-datasets/resolve/main/pokemon.png"
image = Image.open(requests.get(url, stream=True).raw)
image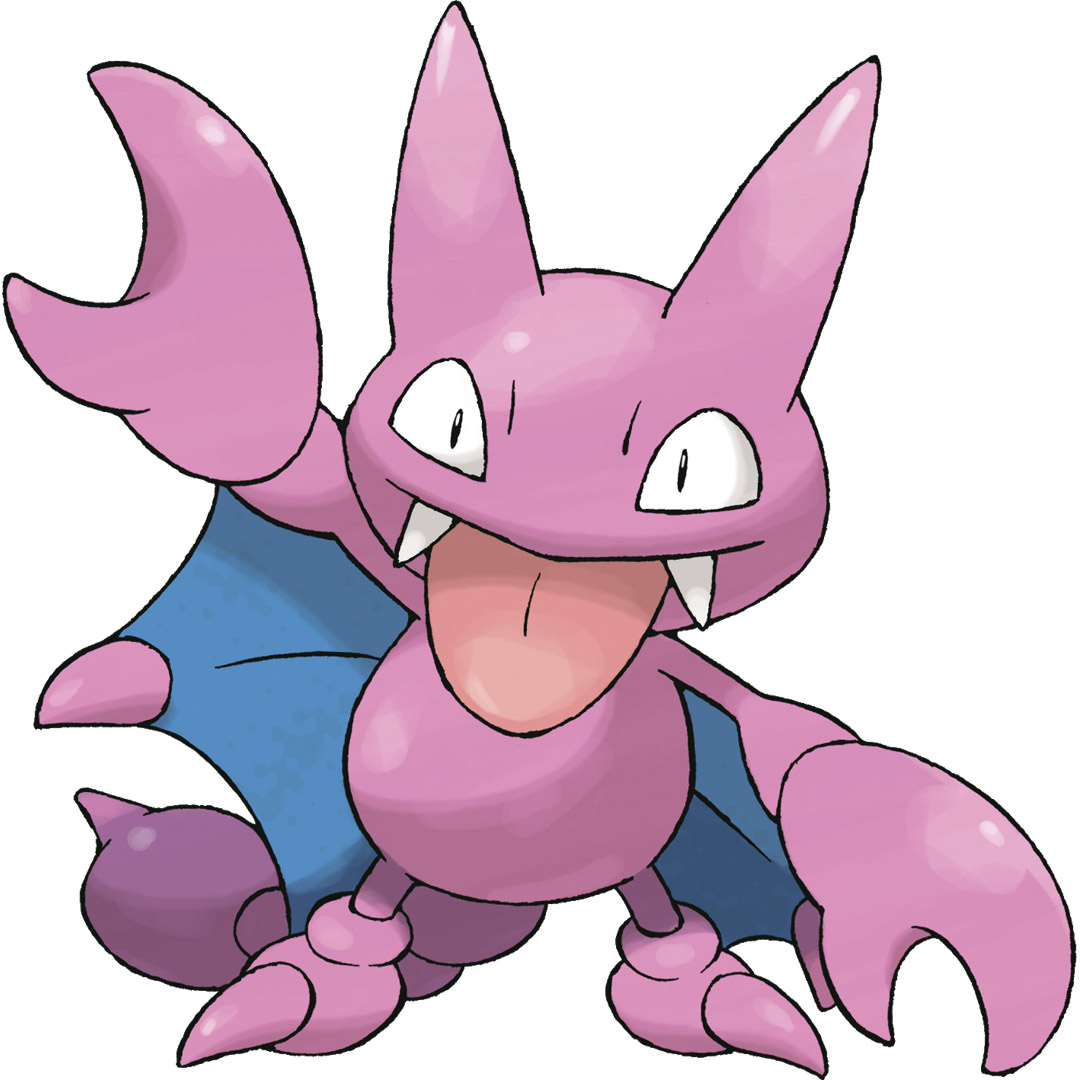
モデル用に画像を準備します。
from accelerate import Accelerator

device = Accelerator().device
inputs = processor(images=image, return_tensors="pt").to(device)
pixel_values = inputs.pixel_valuesgenerateを呼び出し、予測をデコードします。
generated_ids = model.generate(pixel_values=pixel_values, max_length=50)
generated_caption = processor.batch_decode(generated_ids, skip_special_tokens=True)[0]
print(generated_caption)a drawing of a pink and blue pokemon
ファインチューニングされたモデルがかなり良いキャプションを生成したようです!
Update on GitHub