
Diffusers documentation
画像から画像へ
画像から画像へ
Image-to-image is similar to text-to-image, but in addition to a prompt, you can also pass an initial image as a starting point for the diffusion process. The initial image is encoded to latent space and noise is added to it. Then the latent diffusion model takes a prompt and the noisy latent image, predicts the added noise, and removes the predicted noise from the initial latent image to get the new latent image. Lastly, a decoder decodes the new latent image back into an image.
🤗 Diffusers を使えば、1-2-3 のように簡単です:
- AutoPipelineForImage2Image クラスにチェックポイントをロードします。このパイプラインは、チェックポイントに基づいて正しいパイプラインクラスを自動的にロードします。
import torch
from diffusers import AutoPipelineForImage2Image
from diffusers.utils import load_image, make_image_grid

pipeline = AutoPipelineForImage2Image.from_pretrained(
    "kandinsky-community/kandinsky-2-2-decoder", dtype=torch.float16, use_safetensors=True
)
pipeline.enable_model_cpu_offload()
# remove following line if xFormers is not installed or you have PyTorch 2.0 or higher installed
pipeline.enable_xformers_memory_efficient_attention()本ガイド全体を通じて、メモリを節約し推論速度を向上させるために、enable_model_cpu_offload() と enable_xformers_memory_efficient_attention() を使用しています。PyTorch 2.0 を使用している場合、パイプラインに対して enable_xformers_memory_efficient_attention() を呼び出す必要はありません。PyTorch 2.0 のネイティブな scaled-dot product attention がすでに使用されているためです。
- パイプラインに渡すために画像を読み込みます:
init_image = load_image("https://huggingface.co/datasets/huggingface/documentation-images/resolve/main/diffusers/cat.png")- パイプラインにプロンプトと画像を渡して、画像を生成します:
prompt = "cat wizard, gandalf, lord of the rings, detailed, fantasy, cute, adorable, Pixar, Disney, 8k"
image = pipeline(prompt, image=init_image).images[0]
make_image_grid([init_image, image], rows=1, cols=2)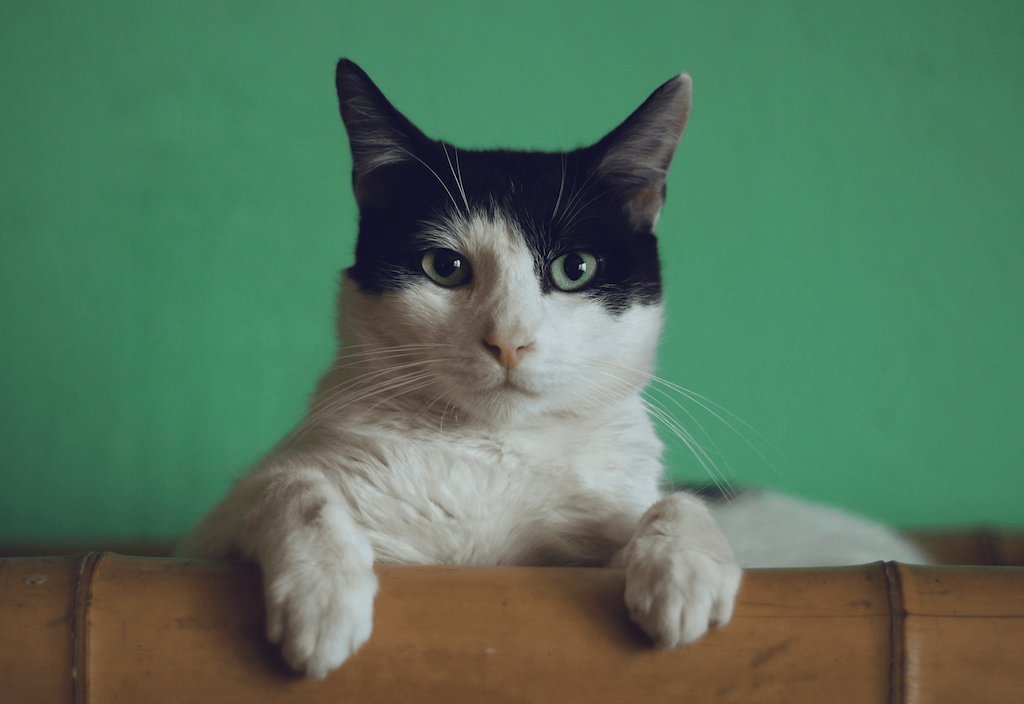

人気モデル
最も人気のある画像生成モデルは、Stable Diffusion v1.5、Stable Diffusion XL (SDXL)、およびKandinsky 2.2です。Stable DiffusionとKandinskyのモデルは、アーキテクチャや学習プロセスの違いにより、生成される結果が異なります。一般的には、SDXLはStable Diffusion v1.5よりも高品質な画像を生成すると期待できます。ここでは、これらのモデルの使い方を簡単に確認し、それぞれの結果を比較してみましょう。
Stable Diffusion v1.5
Stable Diffusion v1.5 は、以前のチェックポイントから初期化された潜在拡散モデルであり、512x512 の画像で 595K ステップにわたってさらにファインチューニングされています。このパイプラインを image-to-image に使用するには、パイプラインに渡す初期画像を準備する必要があります。その後、プロンプトと画像をパイプラインに渡すことで、新しい画像を生成できます。
import torch
from diffusers import AutoPipelineForImage2Image
from diffusers.utils import make_image_grid, load_image

pipeline = AutoPipelineForImage2Image.from_pretrained(
    "stable-diffusion-v1-5/stable-diffusion-v1-5", dtype=torch.float16, variant="fp16", use_safetensors=True
)
pipeline.enable_model_cpu_offload()
# remove following line if xFormers is not installed or you have PyTorch 2.0 or higher installed
pipeline.enable_xformers_memory_efficient_attention()

# prepare image
url = "https://huggingface.co/datasets/huggingface/documentation-images/resolve/main/diffusers/img2img-init.png"
init_image = load_image(url)

prompt = "Astronaut in a jungle, cold color palette, muted colors, detailed, 8k"

# pass prompt and image to pipeline
image = pipeline(prompt, image=init_image).images[0]
make_image_grid([init_image, image], rows=1, cols=2)

Stable Diffusion XL (SDXL)
SDXLは、Stable Diffusionモデルのより高性能なバージョンです。より大きなベースモデルと、ベースモデルの出力品質を高めるための追加のリファイナーモデルを使用しています。このモデルの使用方法や、高品質な画像を生成するために用いられるその他の技術について詳しくは、SDXLガイドを参照してください。
import torch
from diffusers import AutoPipelineForImage2Image
from diffusers.utils import make_image_grid, load_image

pipeline = AutoPipelineForImage2Image.from_pretrained(
    "stabilityai/stable-diffusion-xl-refiner-1.0", dtype=torch.float16, variant="fp16", use_safetensors=True
)
pipeline.enable_model_cpu_offload()
# remove following line if xFormers is not installed or you have PyTorch 2.0 or higher installed
pipeline.enable_xformers_memory_efficient_attention()

# prepare image
url = "https://huggingface.co/datasets/huggingface/documentation-images/resolve/main/diffusers/img2img-sdxl-init.png"
init_image = load_image(url)

prompt = "Astronaut in a jungle, cold color palette, muted colors, detailed, 8k"

# pass prompt and image to pipeline
image = pipeline(prompt, image=init_image, strength=0.5).images[0]
make_image_grid([init_image, image], rows=1, cols=2)

Kandinsky 2.2
Kandinskyモデルは、画像埋め込みを生成するために画像事前モデルを使用するため、Stable Diffusionモデルとは異なります。これらの埋め込みはテキストと画像の間のアライメントを向上させ、潜在拡散モデルにより優れた画像を生成することを可能にします。
Kandinsky 2.2 を使用する最もシンプルな方法は以下の通りです。
import torch
from diffusers import AutoPipelineForImage2Image
from diffusers.utils import make_image_grid, load_image

pipeline = AutoPipelineForImage2Image.from_pretrained(
    "kandinsky-community/kandinsky-2-2-decoder", dtype=torch.float16, use_safetensors=True
)
pipeline.enable_model_cpu_offload()
# remove following line if xFormers is not installed or you have PyTorch 2.0 or higher installed
pipeline.enable_xformers_memory_efficient_attention()

# prepare image
url = "https://huggingface.co/datasets/huggingface/documentation-images/resolve/main/diffusers/img2img-init.png"
init_image = load_image(url)

prompt = "Astronaut in a jungle, cold color palette, muted colors, detailed, 8k"

# pass prompt and image to pipeline
image = pipeline(prompt, image=init_image).images[0]
make_image_grid([init_image, image], rows=1, cols=2) 
パイプラインのパラメータを設定
パイプラインでは、画像生成プロセスや画像の品質に影響を与えるいくつかの重要なパラメータを設定できます。これらのパラメータが何をするものか、またそれらを変更すると出力にどのような影響が出るのかを詳しく見ていきましょう。
強さ
strength は、生成される画像に大きな影響を与える最も重要なパラメータの一つです。初期画像と生成画像の類似度を決定します。言い換えれば:
- 📈
strengthの値を大きくすると、モデルは初期画像と異なる画像を生成する際により「創造性」を発揮します。strengthの値が 1.0 の場合、初期画像はほぼ無視されます。 - 📉
strengthの値が低いほど、生成された画像は初期画像に似通います
strength と num_inference_steps パラメータは関連しており、strength が加えるノイズのステップ数を決定します。例えば、num_inference_steps が 50 で strength が 0.8 の場合、初期画像に 40(50 * 0.8)ステップのノイズを加え、その後 40 ステップのデノイズ処理を行うことで、新しく生成された画像が得られることを意味します。
import torch
from diffusers import AutoPipelineForImage2Image
from diffusers.utils import make_image_grid, load_image

pipeline = AutoPipelineForImage2Image.from_pretrained(
    "stable-diffusion-v1-5/stable-diffusion-v1-5", dtype=torch.float16, variant="fp16", use_safetensors=True
)
pipeline.enable_model_cpu_offload()
# remove following line if xFormers is not installed or you have PyTorch 2.0 or higher installed
pipeline.enable_xformers_memory_efficient_attention()

# prepare image
url = "https://huggingface.co/datasets/huggingface/documentation-images/resolve/main/diffusers/img2img-init.png"
init_image = load_image(url)

prompt = "Astronaut in a jungle, cold color palette, muted colors, detailed, 8k"

# pass prompt and image to pipeline
image = pipeline(prompt, image=init_image, strength=0.8).images[0]
make_image_grid([init_image, image], rows=1, cols=2)


ガイダンススケール
guidance_scale パラメータは、生成された画像とテキストプロンプトの一致度を制御するために使用されます。guidance_scale の値が高いほど、生成された画像はプロンプトに忠実になり、guidance_scale の値が低いほど、生成された画像はプロンプトから大きく逸脱する余地が生まれます。
guidance_scaleとstrengthを組み合わせることで、モデルの表現力に対してさらに精密な制御を行うことができます。例えば、最大限の創造性を求める場合は高いstrength + guidance_scaleを組み合わせ、初期画像に似ているがプロンプトに厳密に縛られない画像を生成したい場合は、低いstrengthと低いguidance_scaleの組み合わせを使用します。
import torch
from diffusers import AutoPipelineForImage2Image
from diffusers.utils import make_image_grid, load_image

pipeline = AutoPipelineForImage2Image.from_pretrained(
    "stable-diffusion-v1-5/stable-diffusion-v1-5", dtype=torch.float16, variant="fp16", use_safetensors=True
)
pipeline.enable_model_cpu_offload()
# remove following line if xFormers is not installed or you have PyTorch 2.0 or higher installed
pipeline.enable_xformers_memory_efficient_attention()

# prepare image
url = "https://huggingface.co/datasets/huggingface/documentation-images/resolve/main/diffusers/img2img-init.png"
init_image = load_image(url)

prompt = "Astronaut in a jungle, cold color palette, muted colors, detailed, 8k"

# pass prompt and image to pipeline
image = pipeline(prompt, image=init_image, guidance_scale=8.0).images[0]
make_image_grid([init_image, image], rows=1, cols=2)


ネガティブプロンプト
ネガティブプロンプトは、モデルが画像に特定の要素を含めないよう条件付けを行うもので、画像品質の向上や画像の修正に利用できます。例えば、「poor details」や「blurry」などのネガティブプロンプトを含めることで、モデルにより高品質な画像を生成させ、画像品質を向上させることができます。また、画像から除外したい要素を指定することで、画像を修正することもできます。
import torch
from diffusers import AutoPipelineForImage2Image
from diffusers.utils import make_image_grid, load_image

pipeline = AutoPipelineForImage2Image.from_pretrained(
    "stabilityai/stable-diffusion-xl-refiner-1.0", dtype=torch.float16, variant="fp16", use_safetensors=True
)
pipeline.enable_model_cpu_offload()
# remove following line if xFormers is not installed or you have PyTorch 2.0 or higher installed
pipeline.enable_xformers_memory_efficient_attention()

# prepare image
url = "https://huggingface.co/datasets/huggingface/documentation-images/resolve/main/diffusers/img2img-init.png"
init_image = load_image(url)

prompt = "Astronaut in a jungle, cold color palette, muted colors, detailed, 8k"
negative_prompt = "ugly, deformed, disfigured, poor details, bad anatomy"

# pass prompt and image to pipeline
image = pipeline(prompt, negative_prompt=negative_prompt, image=init_image).images[0]
make_image_grid([init_image, image], rows=1, cols=2)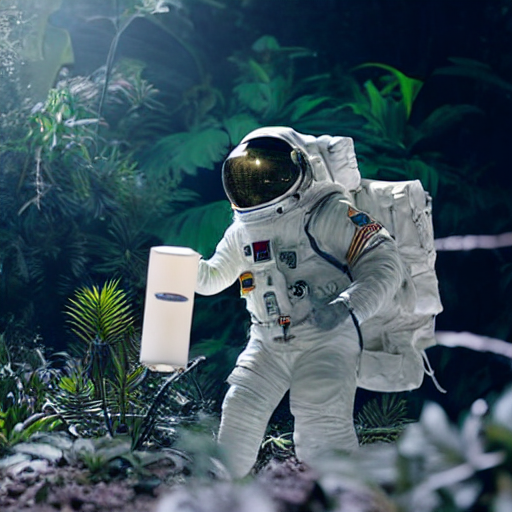
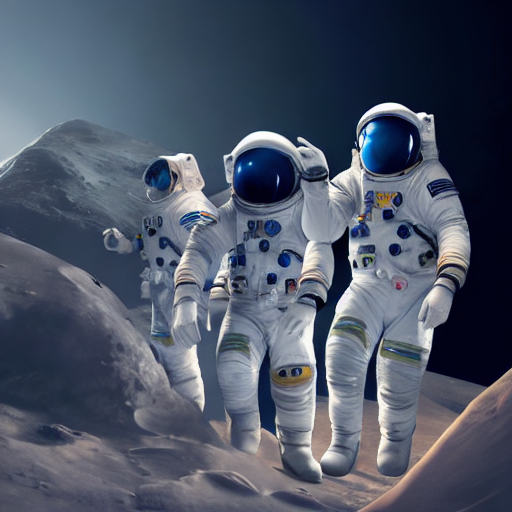
チェーンされた画像から画像へのパイプライン
画像生成(それ自体もかなりクールですが)以外にも、image-to-image パイプラインにはいくつか興味深い使い方があります。さらに一歩進めて、他のパイプラインとチェーンさせることもできます。
テキストから画像へ、画像から画像へ
テキストから画像を生成するパイプラインと、画像から画像を生成するパイプラインをチェーン(連結)することで、テキストから画像を生成し、その生成された画像を画像から画像へのパイプラインの初期画像として使用できます。これは、画像を完全にゼロから生成したい場合に便利です。例えば、Stable DiffusionとKandinskyモデルをチェーンしてみましょう。
テキストから画像を生成するパイプラインで画像を生成することから始めます:
from diffusers import AutoPipelineForText2Image, AutoPipelineForImage2Image
import torch
from diffusers.utils import make_image_grid

pipeline = AutoPipelineForText2Image.from_pretrained(
    "stable-diffusion-v1-5/stable-diffusion-v1-5", dtype=torch.float16, variant="fp16", use_safetensors=True
)
pipeline.enable_model_cpu_offload()
# remove following line if xFormers is not installed or you have PyTorch 2.0 or higher installed
pipeline.enable_xformers_memory_efficient_attention()

text2image = pipeline("Astronaut in a jungle, cold color palette, muted colors, detailed, 8k").images[0]
text2image
これで、生成された画像をimage-to-imageパイプラインに渡すことができます。
pipeline = AutoPipelineForImage2Image.from_pretrained(
    "kandinsky-community/kandinsky-2-2-decoder", dtype=torch.float16, use_safetensors=True
)
pipeline.enable_model_cpu_offload()
# remove following line if xFormers is not installed or you have PyTorch 2.0 or higher installed
pipeline.enable_xformers_memory_efficient_attention()

image2image = pipeline("Astronaut in a jungle, cold color palette, muted colors, detailed, 8k", image=text2image).images[0]
make_image_grid([text2image, image2image], rows=1, cols=2)
画像から画像へ、さらに画像へ
複数のimage-to-imageパイプラインをチェーンして接続することで、より興味深い画像を作成することもできます。これは、画像に対してスタイル転送を反復的に実行したり、短いGIFを生成したり、画像の色を復元したり、画像の欠損部分を復元したりする場合に役立ちます。
画像を生成することから始めます:
import torch
from diffusers import AutoPipelineForImage2Image
from diffusers.utils import make_image_grid, load_image

pipeline = AutoPipelineForImage2Image.from_pretrained(
    "stable-diffusion-v1-5/stable-diffusion-v1-5", dtype=torch.float16, variant="fp16", use_safetensors=True
)
pipeline.enable_model_cpu_offload()
# remove following line if xFormers is not installed or you have PyTorch 2.0 or higher installed
pipeline.enable_xformers_memory_efficient_attention()

# prepare image
url = "https://huggingface.co/datasets/huggingface/documentation-images/resolve/main/diffusers/img2img-init.png"
init_image = load_image(url)

prompt = "Astronaut in a jungle, cold color palette, muted colors, detailed, 8k"

# pass prompt and image to pipeline
image = pipeline(prompt, image=init_image, output_type="latent").images[0]
パイプラインで
output_type="latent"を指定することが重要です。これにより、すべての出力を潜在空間に保ち、不要なデコード・エンコードのステップを回避できます。この機能は、チェーンされたパイプラインが同じVAEを使用している場合にのみ動作します。
このパイプラインの潜在出力を次のパイプラインに渡し、コミックブックアートスタイルの画像を生成します:
pipeline = AutoPipelineForImage2Image.from_pretrained(
    "ogkalu/Comic-Diffusion", dtype=torch.float16
)
pipeline.enable_model_cpu_offload()
# remove following line if xFormers is not installed or you have PyTorch 2.0 or higher installed
pipeline.enable_xformers_memory_efficient_attention()

# need to include the token "charliebo artstyle" in the prompt to use this checkpoint
image = pipeline("Astronaut in a jungle, charliebo artstyle", image=image, output_type="latent").images[0]もう一度繰り返して、ピクセルアートスタイルの最終画像を生成します:
pipeline = AutoPipelineForImage2Image.from_pretrained(
    "kohbanye/pixel-art-style", dtype=torch.float16
)
pipeline.enable_model_cpu_offload()
# remove following line if xFormers is not installed or you have PyTorch 2.0 or higher installed
pipeline.enable_xformers_memory_efficient_attention()

# need to include the token "pixelartstyle" in the prompt to use this checkpoint
image = pipeline("Astronaut in a jungle, pixelartstyle", image=image).images[0]
make_image_grid([init_image, image], rows=1, cols=2)
画像からアップスケーラーへ、さらにスーパーレゾリューションへ
画像生成パイプラインをチェーンするもう一つの手法として、アップスケーラーとスーパーリゾリューションパイプラインを組み合わせることで、画像のディテールレベルを大幅に高めることができます。
画像から画像へのパイプラインから始めます:
import torch
from diffusers import AutoPipelineForImage2Image
from diffusers.utils import make_image_grid, load_image

pipeline = AutoPipelineForImage2Image.from_pretrained(
    "stable-diffusion-v1-5/stable-diffusion-v1-5", dtype=torch.float16, variant="fp16", use_safetensors=True
)
pipeline.enable_model_cpu_offload()
# remove following line if xFormers is not installed or you have PyTorch 2.0 or higher installed
pipeline.enable_xformers_memory_efficient_attention()

# prepare image
url = "https://huggingface.co/datasets/huggingface/documentation-images/resolve/main/diffusers/img2img-init.png"
init_image = load_image(url)

prompt = "Astronaut in a jungle, cold color palette, muted colors, detailed, 8k"

# pass prompt and image to pipeline
image_1 = pipeline(prompt, image=init_image, output_type="latent").images[0]
パイプラインで
output_type="latent"を指定し、すべての出力を潜在空間に保つことが重要です。これにより、不要なデコード・エンコードのステップを回避できます。ただし、これはチェーンされたパイプラインが同じVAEを使用している場合にのみ機能します。
アップスケーラーのパイプラインに接続して、画像の解像度を向上させます:
from diffusers import StableDiffusionLatentUpscalePipeline

upscaler = StableDiffusionLatentUpscalePipeline.from_pretrained(
    "stabilityai/sd-x2-latent-upscaler", dtype=torch.float16, use_safetensors=True
)
upscaler.enable_model_cpu_offload()
upscaler.enable_xformers_memory_efficient_attention()

image_2 = upscaler(prompt, image=image_1).images[0]
最後に、スーパーリゾリューションパイプラインにチェーンして、解像度をさらに向上させます:
from diffusers import StableDiffusionUpscalePipeline

super_res = StableDiffusionUpscalePipeline.from_pretrained(
    "stabilityai/stable-diffusion-x4-upscaler", dtype=torch.float16, variant="fp16", use_safetensors=True
)
super_res.enable_model_cpu_offload()
super_res.enable_xformers_memory_efficient_attention()

image_3 = super_res(prompt, image=image_2).images[0]
make_image_grid([init_image, image_3.resize((512, 512))], rows=1, cols=2)
画像生成の制御
望み通りの見た目の画像を生成することは難しい場合があり、そのため制御可能な生成手法やモデルが非常に有用です。negative_prompt を使用して画像生成を部分的に制御することは可能ですが、プロンプト重み付けや ControlNet のようなより堅牢な手法もあります。
プロンプトの重み付け
プロンプト重み付けにより、プロンプト内の各概念の表現をスケーリングできます。例えば、「Astronaut in a jungle, cold color palette, muted colors, detailed, 8k」というプロンプトでは、「astronaut」や「jungle」の埋め込みを大きくしたり小さくしたりできます。Compelライブラリは、プロンプトの重みを調整し、埋め込みを生成するためのシンプルな構文を提供しています。埋め込みの作成方法については、Prompt weightingガイドを参照してください。
AutoPipelineForImage2Imageには、promptパラメータに代わって埋め込みベクトルを渡すためのprompt_embeds(ネガティブプロンプトを使用している場合はnegative_prompt_embeds)パラメータがあります。
from diffusers import AutoPipelineForImage2Image
import torch

pipeline = AutoPipelineForImage2Image.from_pretrained(
    "stable-diffusion-v1-5/stable-diffusion-v1-5", dtype=torch.float16, variant="fp16", use_safetensors=True
)
pipeline.enable_model_cpu_offload()
# remove following line if xFormers is not installed or you have PyTorch 2.0 or higher installed
pipeline.enable_xformers_memory_efficient_attention()

image = pipeline(prompt_embeds=prompt_embeds, # generated from Compel
    negative_prompt_embeds=negative_prompt_embeds, # generated from Compel
    image=init_image,
).images[0]
ControlNet
ControlNetは、追加の条件付け画像を使用できるため、画像生成をより柔軟かつ正確に制御する方法を提供します。条件付け画像には、canny画像、深度マップ、画像セグメンテーション、さらには落書きさえも使用できます。選択した条件付け画像の種類にかかわらず、ControlNetはその情報を含む画像を生成します。
例えば、画像に深度マップを条件付けすることで、画像内の空間情報を保持できます。
from diffusers.utils import load_image, make_image_grid

# prepare image
url = "https://huggingface.co/datasets/huggingface/documentation-images/resolve/main/diffusers/img2img-init.png"
init_image = load_image(url)
init_image = init_image.resize((958, 960)) # resize to depth image dimensions
depth_image = load_image("https://huggingface.co/lllyasviel/control_v11f1p_sd15_depth/resolve/main/images/control.png")
make_image_grid([init_image, depth_image], rows=1, cols=2)
深度マップで条件付けされた ControlNet モデルと AutoPipelineForImage2Image を読み込みます:
from diffusers import ControlNetModel, AutoPipelineForImage2Image
import torch

controlnet = ControlNetModel.from_pretrained("lllyasviel/control_v11f1p_sd15_depth", dtype=torch.float16, variant="fp16", use_safetensors=True)
pipeline = AutoPipelineForImage2Image.from_pretrained(
    "stable-diffusion-v1-5/stable-diffusion-v1-5", controlnet=controlnet, dtype=torch.float16, variant="fp16", use_safetensors=True
)
pipeline.enable_model_cpu_offload()
# remove following line if xFormers is not installed or you have PyTorch 2.0 or higher installed
pipeline.enable_xformers_memory_efficient_attention()
深度マップ、初期画像、プロンプトを条件として、新しい画像を生成します:
prompt = "Astronaut in a jungle, cold color palette, muted colors, detailed, 8k"
image_control_net = pipeline(prompt, image=init_image, control_image=depth_image).images[0]
make_image_grid([init_image, depth_image, image_control_net], rows=1, cols=3) 
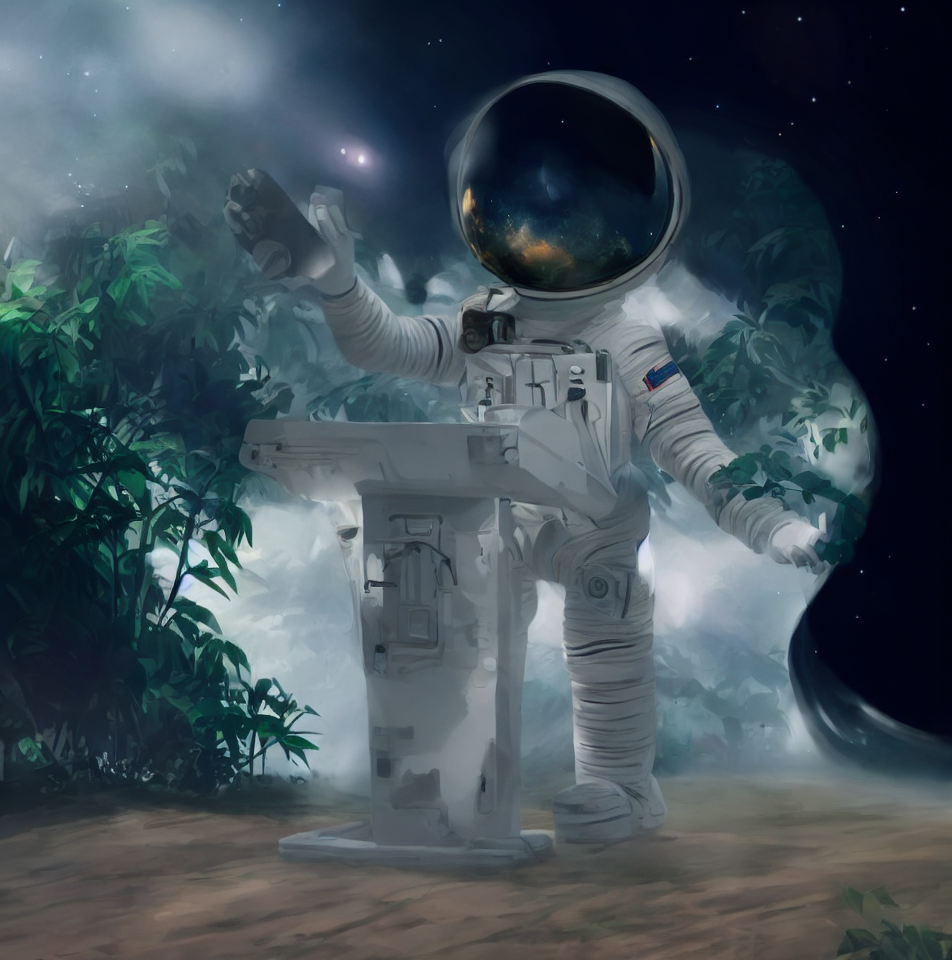
ControlNetで生成された画像に、画像から画像へのパイプラインをチェーンして新しいスタイルを適用してみましょう。
pipeline = AutoPipelineForImage2Image.from_pretrained(
    "nitrosocke/elden-ring-diffusion", dtype=torch.float16,
)
pipeline.enable_model_cpu_offload()
# remove following line if xFormers is not installed or you have PyTorch 2.0 or higher installed
pipeline.enable_xformers_memory_efficient_attention()

prompt = "elden ring style astronaut in a jungle" # include the token "elden ring style" in the prompt
negative_prompt = "ugly, deformed, disfigured, poor details, bad anatomy"

image_elden_ring = pipeline(prompt, negative_prompt=negative_prompt, image=image_control_net, strength=0.45, guidance_scale=10.5).images[0]
make_image_grid([init_image, depth_image, image_control_net, image_elden_ring], rows=2, cols=2)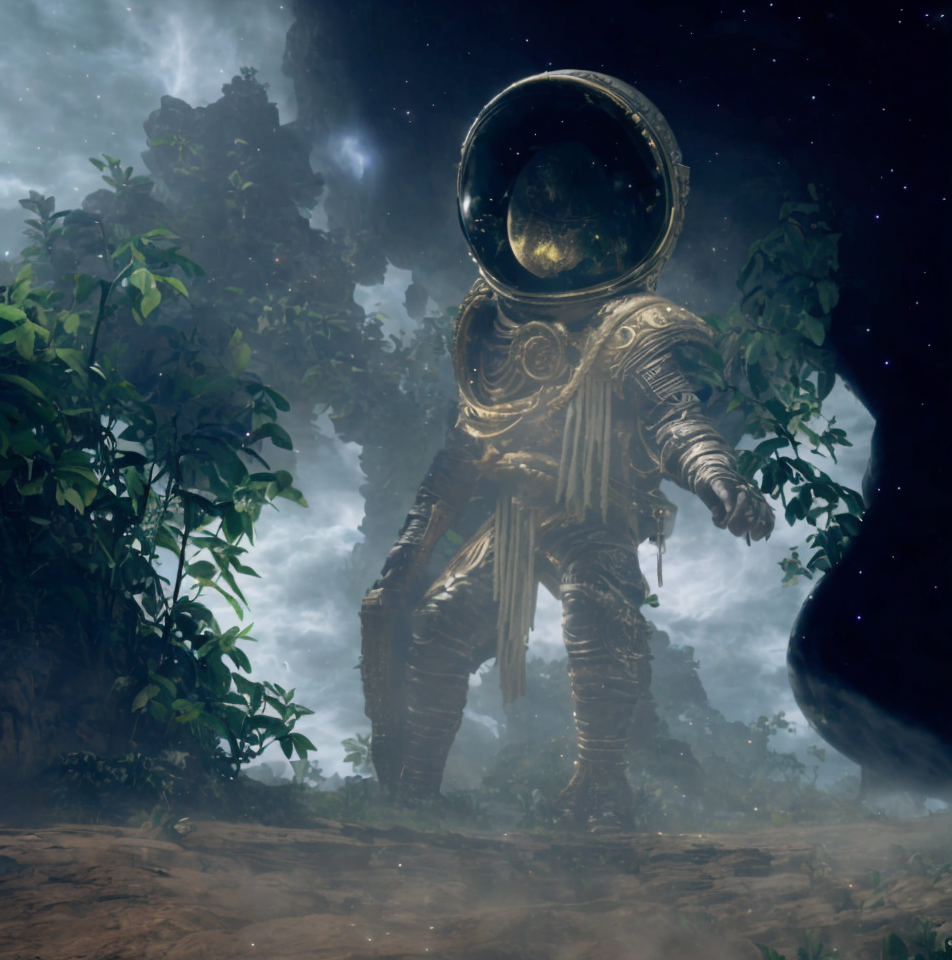
最適化
拡散モデルの実行は計算コストが高く、リソースを大量に消費しますが、いくつかの最適化テクニックを用いることで、コンシューマー向けGPUや無料枠のGPU上で実行することが完全に可能になります。例えば、PyTorch 2.0のscaled-dot product attentionやxFormersなど、メモリ効率の高いアテンション形式を使用できます(どちらか一方を使用すればよく、両方を使用する必要はありません)。また、パイプラインの他のコンポーネントがCPU上で待機している間に、モデルをGPUにオフロードすることもできます。
+ pipeline.enable_model_cpu_offload()
+ pipeline.enable_xformers_memory_efficient_attention()
torch.compile を使用すると、UNet をラップすることで、推論速度をさらに向上させることができます:
pipeline.unet = torch.compile(pipeline.unet, mode="reduce-overhead", fullgraph=True)詳細については、メモリ使用量の削減および推論の高速化のガイドをご覧ください。
Update on GitHub